How to install underfloor heating
If you’re fitting out your bathroom and want to create a cosy environment, then underfloor heating is a great idea and one which is increasingly popular for many homeowners. While we always recommend hiring a professional to install bathroom-ware, if you’re confident with DIY then you might want to try installing underfloor heating yourself.
Whether you’re planning to do the work or simply want to find out more, read to the end of the blog for an overview of how to go about fitting underfloor heating in your home.

underfloor heating can be either electric or water-based.
Step-by-step guide to fitting underfloor heating
When it comes to installing your underfloor heating there are several elements to bear in mind, depending on the type of flooring you have and how capable you feel in terms of laying it. The following points will give you a step-by-step guide on how best to approach the job:
Plan and design: The first thing to do is determine the areas where you want to install underfloor heating, considering the layout of the room, type of flooring and any obstacles, such as furniture or fixtures.
Choose the type of underfloor heating: There are two main types of underfloor heating – electric and water-based/wet underfloor heating. Electric systems are easier to install but can also be more expensive to run, while wet underfloor heating is more complex to install but can be more cost-effective in the long run.
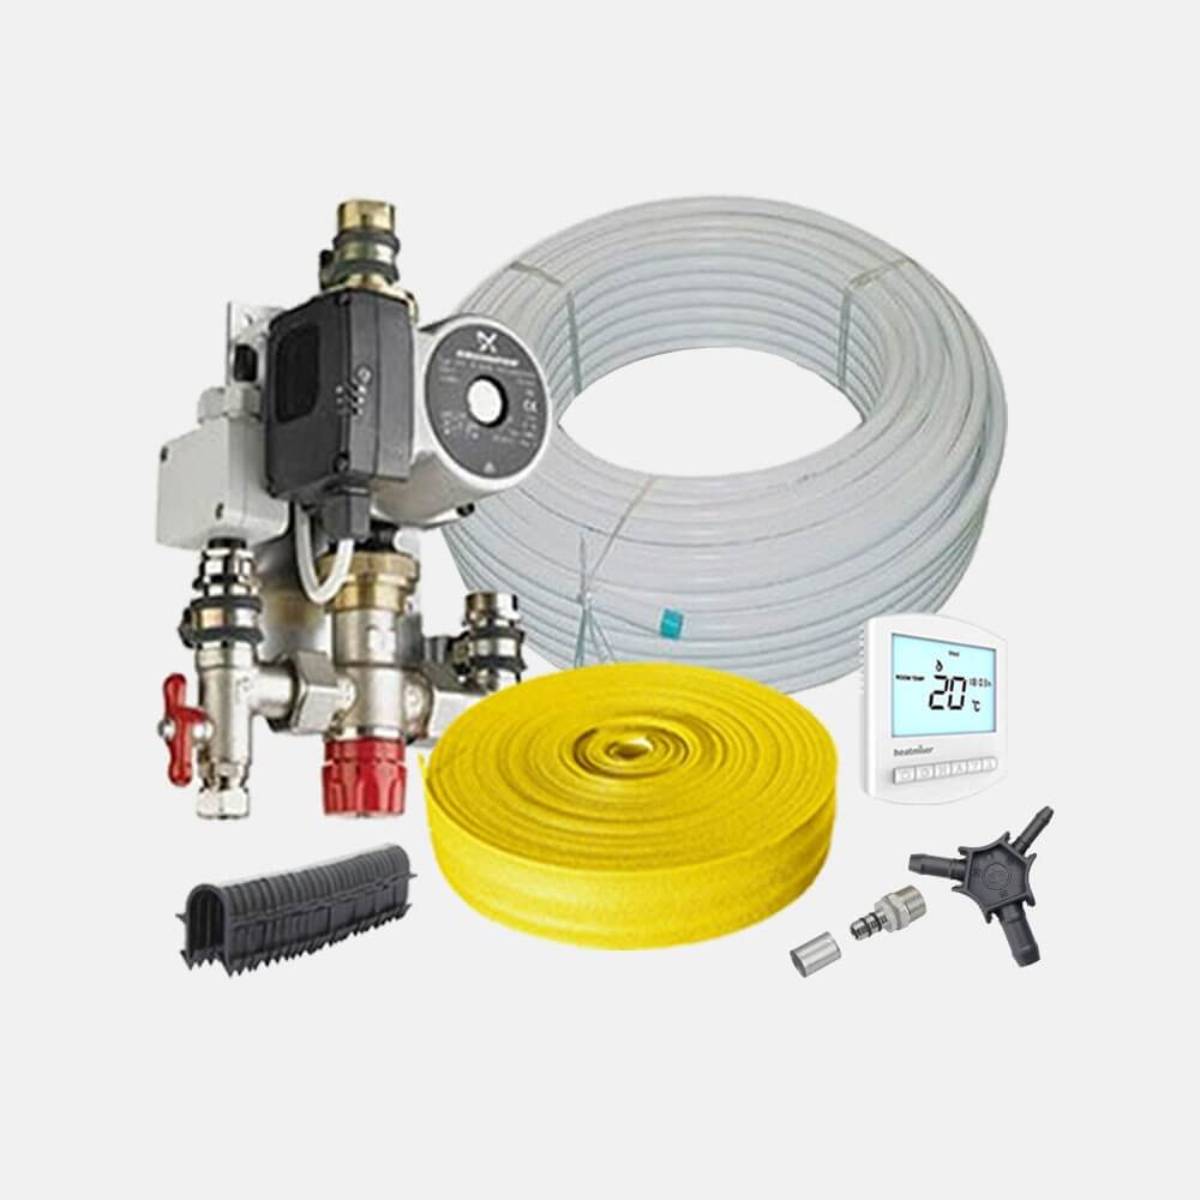
An example of a water-based underfloor heating kit.
Prepare the subfloor: Once you’ve chosen your underfloor heating, ensure that the subfloor is clean, level and dry. If necessary, repair any damaged areas and apply a suitable primer.
Install insulation: Lay down insulation boards to minimise heat loss and improve the efficiency of the system. This step is especially important for ground floors and rooms with poor insulation.
Lay heating elements: For electric systems, roll out the heating mats or cables according to the manufacturer's instructions. For water-based systems, lay down the piping in a serpentine pattern across the floor, ensuring consistent spacing.
Connect the system: For electric systems, connect the heating elements to the thermostat and power supply. For water-based systems, connect the piping to the manifold and boiler.
Test the system: Before covering the heating elements with flooring material, test the system to ensure everything is working correctly. Check for any leaks (for water-based systems) and verify that the heating elements are heating up evenly.
Cover with flooring material: Once the system is tested and confirmed to be working properly, cover the heating elements with the appropriate flooring material. This could be tiles, laminate, engineered wood, or other suitable options.
Install thermostat: Install the thermostat in a convenient location and connect it to the heating system. Program the thermostat according to your preferences for temperature control.
Final checks: After installation is complete, double-check all connections and ensure that the system is functioning as expected. Make any necessary adjustments before using the heating system regularly.
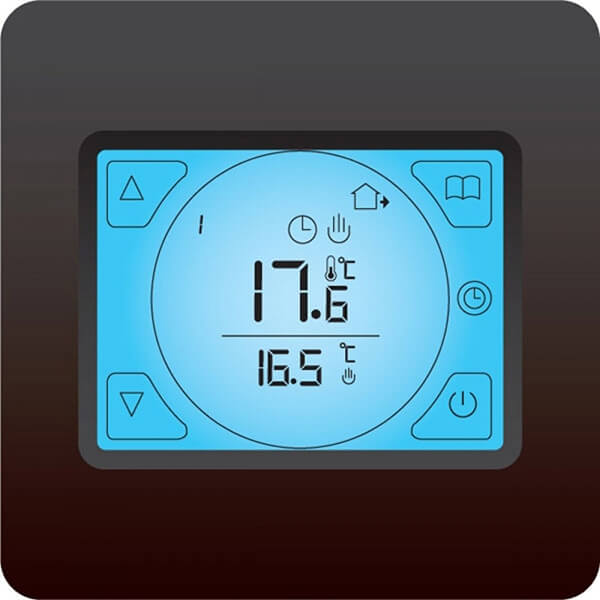
Underfloor heating is operated via a handy thermostat which you can program according to your personal preferences.
If you’re installing your own underfloor heating, then it’s essential to follow the manufacturer’s instructions, to ensure the best results. What’s more, if you aren’t confident about your DIY skills, then it’s always best to hire a professional to ensure correct and safe installation.
To view our full range of underfloor heating and accessories, visit Bathshack.com and if you have any queries, just email us at info@bathshack.com, call us on (028) 9077 0188 or use our online chat.