How to change a radiator valve
If your radiators have stopped working properly, then it may be time to change the valves. While we would always recommend hiring a professional to do this – particularly if you don’t do a lot of DIY – we’ve put together a guide on what to do, should this be something you feel confident about attempting.
Alternatively, it can just be useful to know how things operate, whether you’re doing the work or not – so read to the end of the blog to find out the key steps to changing a radiator valve.
Radiator valves will need replaced if they stop working or have become old or outdated.
Preparing to change your radiator valve
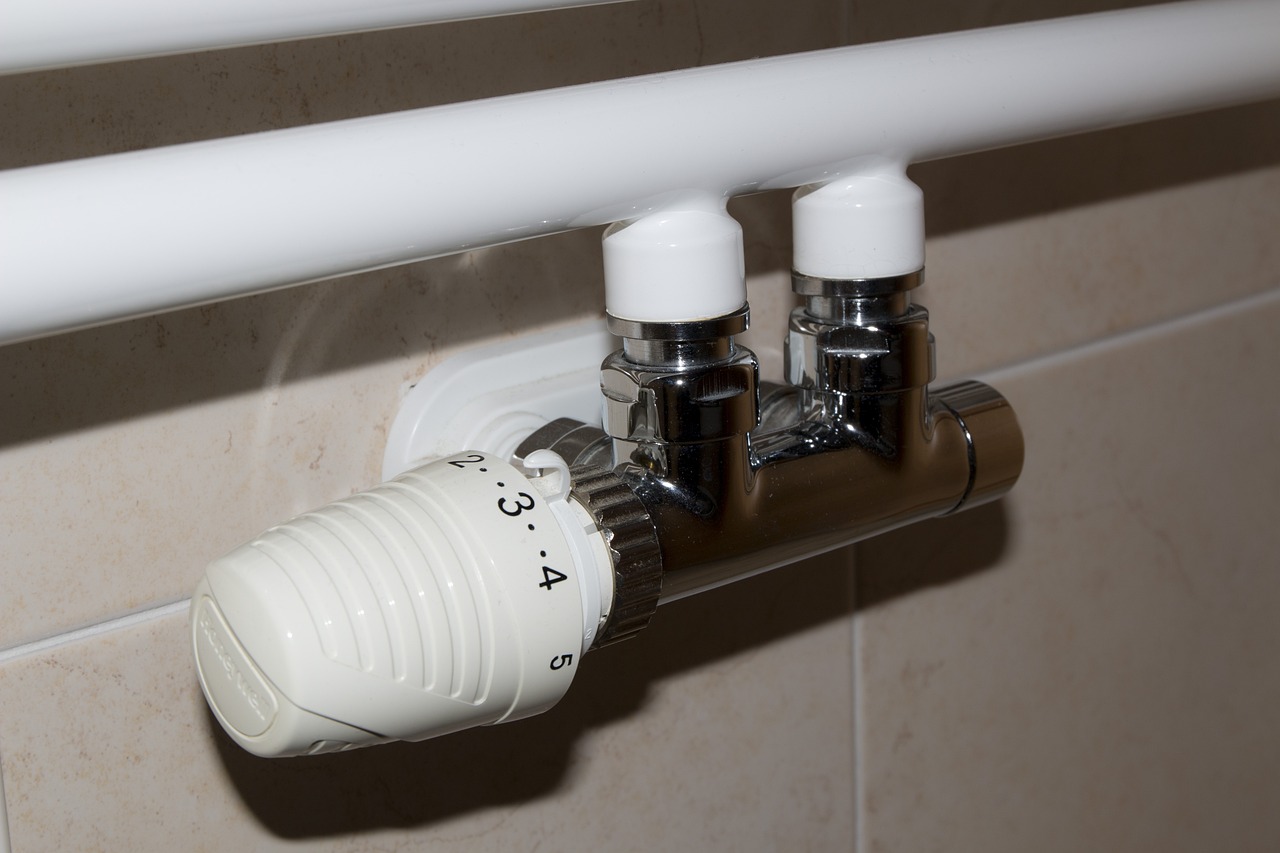
Depending on what type of radiator you have, the valve might be located in different places. With more traditional column-style radiators, the valves will generally be found at the bottom of the radiator, where the water pipe comes up from the floor to fill it. On heated towel rails, however, valves may be higher up, fitted to the wall.
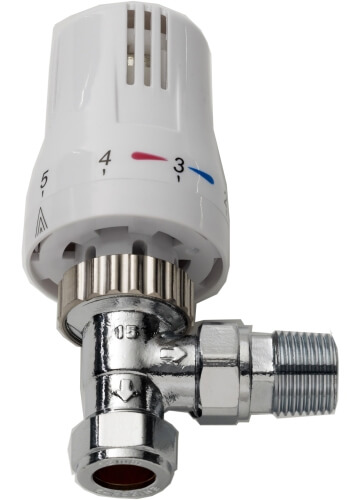
You can then have either manual valves or the more modern thermostatic valves on your radiator.
Tools required to change a radiator valve:
- Adjustable spanner
- Plumber’s wrench
- Towel
- Container for collecting any water/spillage
- Hex key (hexagonal radiator spanner)
- Hose
- Jubilee clip
- PTFE/plumber’s tape (can be used to wrap around pipe threads and to prevent leaks from joints)
NB This is a general guide to changing a radiator valve – please always check what your specific radiator requires before doing any work and, if in doubt, hire a professional. Also, make sure that your new valve will fit onto your existing water pipe.
If you aren’t used to DIY then it’s best to get a professional to change your radiator valves.
Step-by-step guide to changing a radiator valve
Step one
Turn heating and water off: (NB This instruction is for combi boiler systems – for others, please speak to a professional). Make sure all electrics are switched off and that thermostats are turned down, with any programmes stopped to ensure that the heating won’t come on.
Step two
Drain the heating system: Locate the drain-off valve (also called a drain cock) and connect the hose to this, securing it with the jubilee clip, before running the hose outside and opening up the drain-off valve to release the water. Once the system is empty you can then replace the valve.
NB It can take around ten minutes to drain the system completely, though this may vary slightly from system to system. You can use your towel at this stage to collect any drips, or a container for spillage.
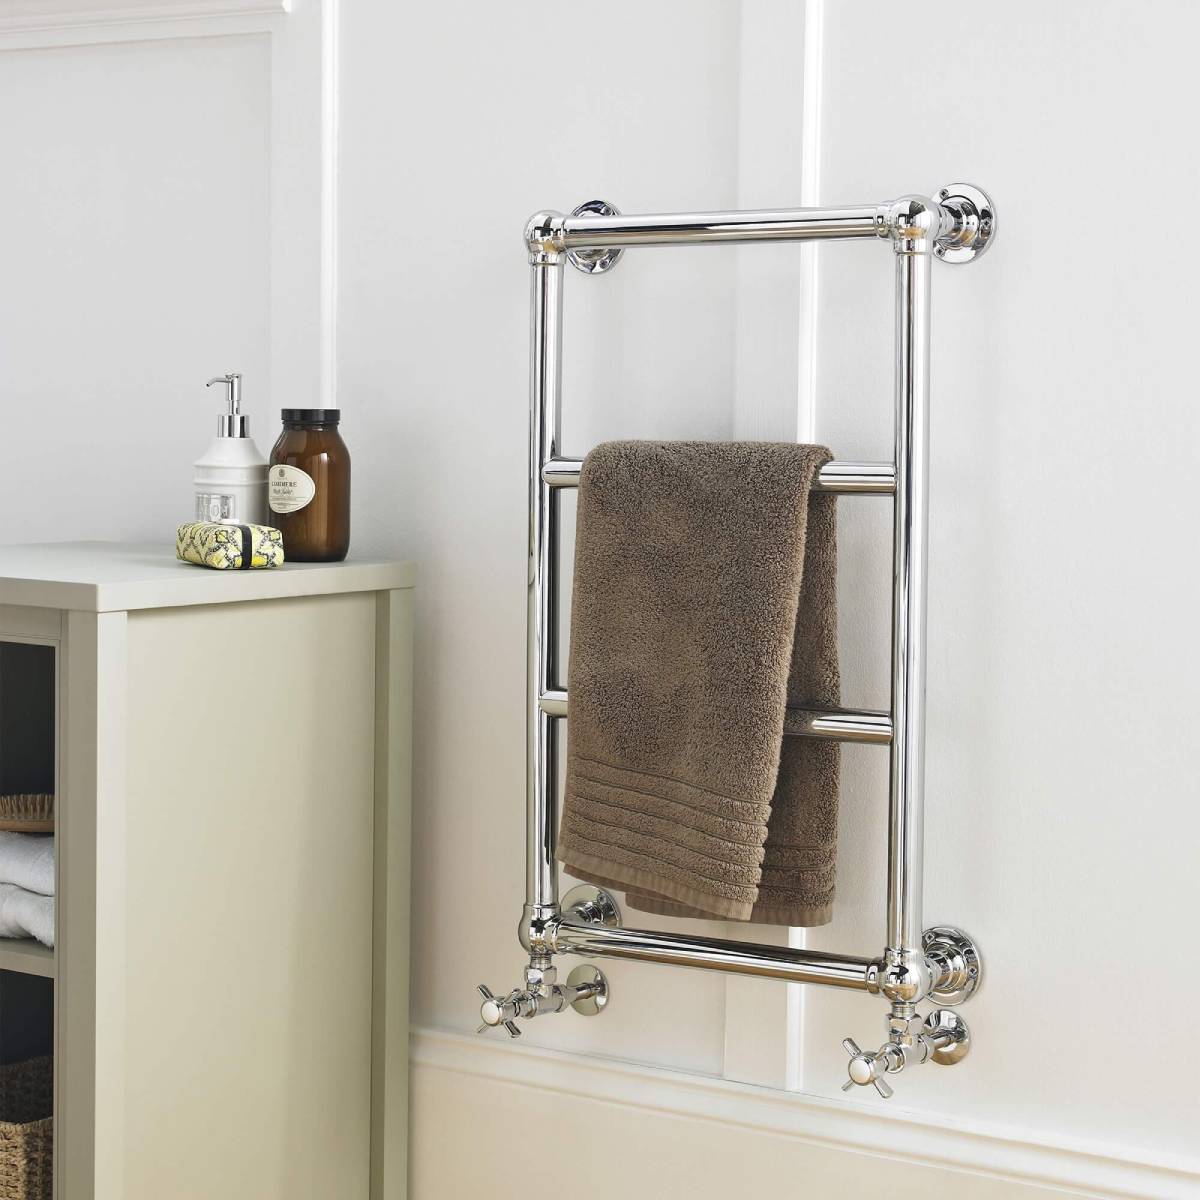
Heated towel rails and radiators will usually have their valves located on the walls, rather than at the bottom, like traditional radiators.
Step three
Remove the existing radiator valve: Use the wrench to secure the old radiator valve and the spanner to unscrew the nuts from the top and bottom of the valve. You can also use the hex key or plumber’s wrench to remove the chrome tail connecting the valve to the radiator. Clean the area before fitting the new valve.
Step four
Fit the new valve: First, fit the new chrome radiator tail, replacing the one you just removed and using PTFE tape if you want to prevent the risk of leaks. Fit the nut and olive onto the radiator tail and water pipe, before attaching the body of the valve, connecting this to the water pipe and inserting it into the radiator tail.
Secure but don’t overtighten the nuts. Once this is done, then unscrew the protective cap of the valve body and connect the top of the valve to the body, tightening the nut a little further, before screwing the cap back on.
Step five
Turn the mains water and heating back on: Make sure all the radiator valves are now closed, before turning everything back on, keeping an eye out for any leaks.
Step six
Bleed the radiator: If there are no leaks, then you can open up the bleed valve to release any air that might be trapped inside the radiator, before opening up the lockshield valve to allow the water to flow freely again.
After the heating has been on for a few hours, you can do some final checks:
- Make sure the drain-off and air valves are turned off
- Turn the water mains on
- Bleed the radiators
- Check all joints to ensure there are no leaks
Once you’ve completed these steps – congratulations, you’ve just successfully changed your radiator valves and can enjoy the benefits of this, with more efficient heating.
You can purchase a range of radiator valves at bathshack.com.
Buy your radiator valves online at bathshack.com. Alternatively, if you have any questions about radiators or any other bathroom products, just email our team at info@bathshack.com, call us on (028) 9077 0188 or use our online chat.